Lights to illuminate your Figurals
It all begins with an idea.
There are a few options for illuminating your globes, however, one seems far more suited to this application than any of the others
I chose to use a 5mm 5 volt RGB full color LEDS from https://www.aliexpress.com/item/32650249968.html
5mm because that fits well with the 9mm ‘housing’ and the original size of the figurals
5 volts because it assists with a simple power supply arrangement.
Before you immediately go and order these you will probably want to customise them beyond what is shown on the web page.
The first thing to change is the length, 3cm between LEDs is quite short for what we want. I used 10cm for my ‘table runner’ and 30cm for my Christmas tree.
Since I didn’t know how long my table runner needed to be I ordered the ‘standard’ ‘100 pcs’, but I suggest you might want to order a different quantity. For my table runner I used 28 LEDS.

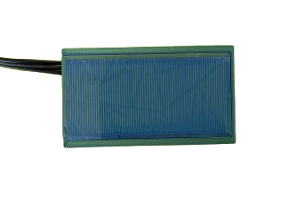
‘Top end’ of lights
Another change to make is to request no Red/Black power leads, as it makes the rear of first led ‘too big’ to be connected to the figurals properly.

‘Bottom end of Lights’
Something else you might want to consider is not having a 3 pin plug at the end, unless there’s a chance that you might want to sometimes ‘extend’ your string of lights.
Once you have worked out exactly what you want, click on the ‘Message’ and tell the supplier exactly what you want and they will draw up a quote. The message button is to the right of Shenzhen Rita’s logo and name, about half way down.
I have spoken with Shenzhen Rita and they are happy to quote for any or all of these modifications.
Whilst you are waiting for your lights to arrive you can 3D print the base which goes over the globe to support the figurals themselves. Click here.
Processor / CPU / Computer
It all begins with an idea.
To drive and control the LEDs you will need a computer, a tiny one at that. I chose a ‘NodeMcu v3’, as it is more than capable of doing the job and is very economical, at only a couple of bucks.
I purchased mine from https://www.aliexpress.com/item/1005007982713351.html I’d suggest you choose the Micro-USB option over the type C USB connector, as, if you are going to power everything by power bank, most low cost power bank leads come with Micro-USB leads and that’s really all that’s needed here. Perhaps also read the Power section before choosing type C, if you really want to go that way.

A NodeMCU processor
I did spot a few very slightly cheaper versions, but it was not clear if the headers come soldered or not, and for ease of assembly it is important that they are.
Another consideration for using this module is that if you use something different, you will probably need to change the enclosure for it.
The computer savvy amongst you might notice that this module has WiFi capability and thus it should be possible to dynamically change the LED programming from your phone. Whilst this certainly seems doable, I will leave it for someone else to do.
Install Arduino IDE.
Goto https://www.arduino.cc/en/software and download and install the latest version for your computer.
After installing allow it to run, it will make several firewall access requests, allow them. It will also fire off installs for several other, related, products, allow them. It will also request permission to install several device drivers, all them (click ‘install’).
Once it has ‘calmed down’, navigate to where you have saved the source file Link and attempt to open it.
It will then say

(Because that is one of Aruino’s ‘funny’ rules)
Click YES

You now need to install on library, click on the (Library Manager) icon
on the left and type ‘fastLED’, this will cut the list down to a few less entries, ‘FastLED by Daniel Garcia’ should be at the top, otherwise look down the list until you find it. Check the version listed in the comment (comments start with //) after the #include statement in the code window, this lists the highest version with which the figural project has been tested. Whilst you could simply click install to install the latest, this might not work at all well, as often newer versions do not work without significant changes to the code. If you chose the latest and it wont compile you can always come back here and use the dropdown to select a different version to install. Now click ‘Install’, after a little bit of activity, ‘Install’ will change to ‘Remove’. Click on the Library Manager icon again to close the Library Manager.
Now you need to select your ‘board’, go to the ‘Select Board’ at the top and click the dropdown, then ‘Select Other board and Port…’, then type NodeMCU and select ‘NoteMCU 1.0 (ESP12E Module)’ and click OK. In the bottom right of the window
will appear, click Yes. Wait until this completes, it will take a while, completing with a message similar to ‘Platform esp8266:esp8266@3.1.2 installed’.

You should then be able to click on the (verify)
Powering your Lights
It all begins with an idea.
For a table runner you will probably want to power your lights by a power bank, for Christmas tree lights an AC Adapter (Power Adapter) is probably a better choice.
Go to the Power Banks or AC Adapter section, as appropriate.
Power Banks
For small and portable light chains a power bank is probably the best option.
When using a power bank, the computer should be set to limit the maximum power consumption to 500ma. This unlikely to be an issue, as, unless you are trying to have all LEDs on at once at full brightness, or you have way more than 30 (LED) lights, you are unlikely to exceed 500ma, even without setting this limit.
Setting the limit is important as the micro-USB plug and socket, as well as the tracks on the computer’s circuit board are not rated for any higher current This is why most USB ports on computers cannot supply more than 500ma. Also note that in searching for the ratings of micro-USB plugs and sockets I found that most were only rated at 250ma making 500ma seem a bit excessive.
C-Type USB does raise that limit to 3amps (3000ma) and in some cases 5amps, but I doubt very much that the tracks on the CPU are designed to carry this.
The smallest power bank I could find was rated at 3000ma, thus it will drive your lights for at least 6 hours from a full charge.
Wiring up your lights for powering from a power bank is as follows:
You will need 3 short female to female (socket to socket) jumper cables. You can get them from here https://www.aliexpress.com/item/1005001520271890.html although you can probably source them quicker from your local ‘electronics store’.

Female to Female jumper cables
Connect your Lights and CPU together like this


Gently place everything in the 3D printed box like this, the pins on the NodeMCU will be up and the Micro-USB socked will be slightly in the hole at the bottom of the box. The led string socket is inside the box.

Now gently slide the lid over the box.
The lid latches slightly when closed, but it shouldn’t be too hard to open it again, especially with a bit of upward pressure near the ‘latch’.
That’s it for the assembly of your Lights, Processor and Power. All you need to do is connect your power bank to your Processor via the socket in the hole of your box.
AC Adapter
For large and fixed lighting chains consider an AC Adapter (Power adapter)
You will need a 5 volt unit, with a current rating high enough to drive all your LEDs (lights) at the brightness required. 100 LEDs at full brightness (also implies White as the colour) could theoretically require 6amps, although, based on measurements and calculations 4.2 amps seems closer to the mark. In this application your are very unlikely to want all lights on at maximum brightness, so a 4amp power supply would seem to be totally adequate.
I got mine from here https://www.aliexpress.com/item/978238060.html remember to select the correct plug and current rating. You might be able to get this quicker from your local ‘electronics store’.

You will need a socket for the plug on the end of the power supply https://www.aliexpress.com/item/1005002144846941.html You want ‘type A Female’, and select a quantity, although we only need one, when I looked 3, 5 and 10 were all the same price, hopefully you will find a use for the other 9. Again, you might be able to get this quicker from your local ‘electronics store’.

You will need 3 short female to female (socket to socket) jumper cables. You can get them from here https://www.aliexpress.com/item/1005001520271890.html although you can probably source them quicker from your local ‘electronics store’.
Cut a pair of Red and Black wires in half, then strip them for about 1cm and twist them together.

Fold the wires back onto themselves and insert them into the female socket, Red to +ve and Black to -ve and tighten the screws.

Connect your Lights and CPU together like this.
Plug the power supply’s plug into the socket and gently place everything into the 3D printed box like this, the pins on the NodeMCU will be up and the Micro-USB socked will be slightly in the hole at the bottom of the box. The led string socket is inside the box. The power lead is in the top left, the power plug and socket angle down to the bottom right, this is a tight fit.

Now gently slide the lid over the box.

The lid latches slightly when closed, but it shouldn’t be too hard to open it again, especially with a bit of upward pressure near the ‘latch’.
That’s it for the assembly of your Lights, Processor and Power. All you need to do is connect plug in your AC Adapter.
When programming your CPU, remember to unplug the Red wire to the processor, otherwise you could end up destroying your computer, your CPU, or both! (Or neither, but, please, don’t risk it)
Painting
It all begins with an idea.
If you want, or need, to paint your figurals I recommend the Semco 36 pack of 3.6ml pots from Spotlight.

At $AU7 it’s only twice the price of the 12 pack for three times as much, but also the extra colours perfectly match all the colours of my figurals that are not in the 12 pack.
Since you use very little paint and these small pots will probably last forever.
For brushes Bunnings (a large hardware store in Australia) sell ‘craft brushes’ that seem to be similar quality to Spotlight for about half the price.
I made a small stand to support the figurals whilst they are painted and while they dry, you might like to print one.

Click here for the 3D file.
I did try some Born acrylic paint markers from Officeworks, but they did not work at all well for this application.
Configuring the Processor

NodeMCU 1.0 (ESP-12… should be displayed. If your processor is plugged in and it’s serial port is selected then this text should be shown in BOLD. If you have just plugged the processor in then it may take a few seconds to find it and highlight the text. If it doesn’t do this then click Tools, then Port: and click on what should be the only serial port, assuming your computer doesn’t have any extra ports, in which case you will have to decide the correct one.
You should then be able to load the program with the sample configuration by clicking on the upload button under the ellipse marked 2. Have a good look at the patterns you see on your lights and try to come to a bit of an understanding of how they are behaving in relation to the configuration settings above, that start after ellipse 4.
The current setting for the maximum power that the lights will use is 500ma. You can change the value here by changing the number, or commenting out this line and uncommenting the one above it (yes // denotes the start of a comment), adjusting the MAX_MA value to correspond to your power supply.
Here you set NUM_LEDS to the number of LEDs (Lights) in your string.
If you change the configuration to something that is invalid, the first two lights will alternate flashing RED. Hopefully the error will be obvious, if it isn’t, perhaps you can press ^Z (Control and Z) until your recent changes have been undone and slowly work up to the desired change, correctly. If that fails you can uncomment the define DEBUG line and load this code, pressing Control-Shift-M, to bring up the terminal window, after you see the “Hard resetting via RTS pin...” message. You should then get a couple of lines that describe the error with your config file. If you get several lines of meaningless English repeated rapidly, then it would appear you have the same Arduino bug as I do, in this case simply unplug the processor, wait a few seconds and then plug it back in, this time the messages should appear correctly. Note that you will have to press Control-Shift-M again (his time to close the terminal window), before you can load your code again.
After ellipse 4 is the configuration proper, at least one line is required for each light, extra lines are for extra patterns for lights that have Next not set to NO_NEXT. Note the count, in the square braces after led_cfgs is set to NUM_LEDS+2, this is because the last light has a chain of 2 Nexts.
Note the comment immediately underneath ellipse 4, it shows the order of the parameters for each light, the extra spacing is simply for neatness.
Here is a description of what each parameter means and how they relate to other parameters.
Type
lt_Candle. The LED simulates a candle, it varies from Yellow to Red (though Orange) and flickers and fades randomly, as if there is a gentle variable breeze. Group, InitialyOn, Colour/Sequence and Delay are set to N/A, Duration and Next are generally set to INFINITE and NO_NEXT, but this isn’t compulsory.
lt_Star. The LED twinkles like a star, it varies from White to Blue in colour. Essentially this type uses the TwinkleFox BlueWhite colour pattern, but is set to twinkle faster than normal, and is prevented from going ‘off’. TGroup, InitialyOn, Colour/Sequence and Delay are set to N/A, Duration and Next are generally set to INFINITE and NO_NEXT, but this isn’t compulsory.
lt_Constant. The LED is on permanently in the specified colour.
lt_ChaseColorMove. The LEDs in the group chase each other, along with the colour.
lt_ChaseColorStatic. The LEDs in the group chase each other, each LED stays its initial colour from the config.
lt_RoundChaseColorMove. The LEDs in the group chase each other, along with the colour, the chase uses every other LED in the group, and is thus the preferred chase mechanism for table runner type displays.
lt_RoundChaseColorStatic. The LEDs in the group chase each other, each Led stays its initial colour from the config, the chase uses every other LED in the group, and is thus the preferred chase mechanism for table runner type displays.
lt_Blink. The LEDs blink at a rate defined by Delay
lt_Twinkle. The LEDs turn on and off randomly, after every Delay a random choice is made as to whether to leave the LED on, or turn it off.
lt_TwinkleFox. The LEDs twinkle in and out with varying colors from the chosen palette.
Group
Some Types need to be grouped together as the changing of one either affects, or is affected by the rest of the LEDs in the group. All LEDs in a group must have the same type. Lt_Star, lt_TwinkleFox and all the Chase types must have groups.
InitiallyOn
Some types can have their initial status set to on(true) or off(false). This is normally set to on(true) for lt_Constant, but can be set false if you want a LED to always be off. For Chase types you set it to indicate the number of LEDs on at the start of the chase, and hence the number on after every chase movement.
Colour/Sequence
For Constant, Star, Blink, Twinkle and Chase types this is the colour to be used for the LED. Colours are specified as CRGB:: followed by one of the following :
AliceBlue, Amethyst, AntiqueWhite, Aqua, Aquamarine, Azure, Beige, Bisque, Black, BlanchedAlmond, Blue, BlueViolet, Brown, BurlyWood, CadetBlue, Chartreuse, Chocolate, Coral, CornflowerBlue, Cornsilk, Crimson, Cyan, DarkBlue, DarkCyan, DarkGoldenrod, DarkGray, DarkGrey, DarkGreen, DarkKhaki, DarkMagenta, DarkOliveGreen, DarkOrange, DarkOrchid, DarkRed, DarkSalmon, DarkSeaGreen, DarkSlateBlue, DarkSlateGray, DarkSlateGrey, DarkTurquoise, DarkViolet, DeepPink, DeepSkyBlue, DimGray, DimGrey, DodgerBlue, FairyLight, FireBrick, FloralWhite, ForestGreen, Fuchsia, Gainsboro, GhostWhite, Gold, Goldenrod, Gray, Grey, Green, GreenYellow, Honeydew, HotPink, IndianRed, Indigo, Ivory, Khaki, Lavender, LavenderBlush, LawnGreen, LemonChiffon, LightBlue, LightCoral, LightCyan, LightGoldenrodYellow, LightGreen, LightGrey, LightPink, LightSalmon, LightSeaGreen, LightSkyBlue, LightSlateGray, LightSlateGrey, LightSteelBlue, LightYellow, Lime, LimeGreen, Linen, Magenta, Maroon, MediumAquamarine, MediumBlue, MediumOrchid, MediumPurple, MediumSeaGreen, MediumSlateBlue, MediumSpringGreen, MediumTurquoise, MediumVioletRed, MidnightBlue, MintCream, MistyRose, Moccasin, NavajoWhite, Navy, OldLace, Olive, OliveDrab, Orange, OrangeRed, Orchid, PaleGoldenrod, PaleGreen, PaleTurquoise, PaleVioletRed, PapayaWhip, PeachPuff, Peru, Pink, Plaid, Plum, PowderBlue, Purple, Red, RosyBrown, RoyalBlue, SaddleBrown, Salmon, SandyBrown, SeaGreen, Seashell, Sienna, Silver, SkyBlue, SlateBlue, SlateGray, SlateGrey, Snow, SpringGreen, SteelBlue, Tan, Teal, Thistle, Tomato, Turquoise, Violet, Wheat, White, WhiteSmoke, Yellow or YellowGreen.
Other possible colours can be Candle, Tungsten40W, Tungsten100W, Halogen, CarbonArc, HighNoonSun, DirectSunlight, OvercastSky, ClearBlueSky, WarmFluorescent, StandardFluorescent, CoolWhiteFluorescent, FullSpectrumFluorescent, GrowLightFluorescent, BlackLightFluorescent, MercuryVapor, SodiumVapor, MetalHalide or HighPressureSodium. In this case the CRGB:: is not required.
If those options make it too hard to find the colour you want, head over to https://www.rapidtables.com/web/color/RGB_Color.html use the ‘RGB color picker’ to select your desired colour, then copy the code after the # and paste it as the colour, prefixing it with ‘0x’ (eg 0x43B78D ).
For the TwinkleFox type, this is the TwinkleFox group of colours to be used. Possible values are :-
TwinkleFoxRed. A twinkling pattern containing only red
TwinkleFoxLime. A twinkling pattern containing only lime (in computer colours, lime is more green than green, crazy eh)
TwinkleFoxRetroC9. A twinkling pattern shifting through ‘historical’ C9 light colours, Red, Orange, Green, Blue and White
TwinkleFoxBlueWhite. Mostly Blue with White accents
TwinkleFoxRainbowClrs. Colours of the rainbow
TwinkleFoxFairyLight. A fairy light palette with some brightness variations
TwinkleFoxRGW. Mostly Red with Green and White, Christmassy
TwinkleFoxPartyClrs. Blue, Pink,Red, Orange and Yellow, ramped
TwinkleFoxRedWhite. Red and White (Candy cane)
TwinkleFoxSnow. Various snowflake like colours
TwinkleFoxHolly. Holly Red and Holly Green
TwinkleFoxIce. ‘Cold Icy’ pale blue
TwinkleFoxCloud. Blue and White shades.
TwinkleFoxLava. Yellow, Red and White shades.
TwinkleFoxOcean. White, Blue and Purple shades
TwinkleFoxForest. Green, White, Blue and Red shades
TwinkleFoxRainbowStripe. Rainbow with black gaps
TwinkleFoxHeat. Yellow, Orange and Red shades
Delay
For Types Blink, Twinkle and the Chasers (first entry only used) the delay between changes in milliseconds.
Duration
Each LED can change Types, after a given period of time, Duration is the period of time, in milliseconds for which the current type ‘runs’ before progressing to the next Type. All Types for any LED must be either grouped, or not grouped.
Next
After the duration expires this is the number of the next Type for this LED. NO_NEXT is used to indicate either continuously using the one Type, or that the next type is the first type. The second and subsequent Type for any LED can be shared amongst multiple LEDs, if such a sharing is useful.